
All Orders
The All Orders page is where you track and manage every order placed in your store. Open it from Orders → All Orders in the dashboard sidebar.
The orders table
Each order appears as a row with these columns:
- Order ID, a unique reference (click it to open the order's details).
- Date & Time, when the order was placed.
- Customer, who placed it.
- Type, the payment type (for example COD or Card).
- Order Status, for example Unfulfilled.
- Payment, for example Not Paid or Paid.
- Order amount, the order total.
- Items, the number of items.
- Net amount, the net total.
At the top you can also Select Date Range, filter by status, and click + Create Order to add an order manually.
Searching orders
Use the search box (Order ID, phone and name) to quickly find a specific order by its ID, the customer's phone number, or their name.
Filtering by status
Open the All dropdown at the top to show only orders with a certain status:
- All
- Pending
- Accepted
- Rejected
- Cancelled
- Shipped
- Delivered
- Returned
Choosing columns
Click Column to open Show or hide columns. Toggle any column on or off, Order ID, Date & Time, Customer, Type, Order Status, Payment, Order amount, Items, Coupon discount, and Net amount, to control what the table shows.
Sorting
Click Sort to order the list:
- Sort by, Order (Created At), Order (Updated At), or Total Order Amount.
- Sort directions, Ascending or Descending.
Filtering
Click Filter for more precise filters:
- Payment, COD Order and/or Card Order.
- Amount, set a condition and an amount.
- Quantity, set a condition and a quantity.
Viewing an order's details
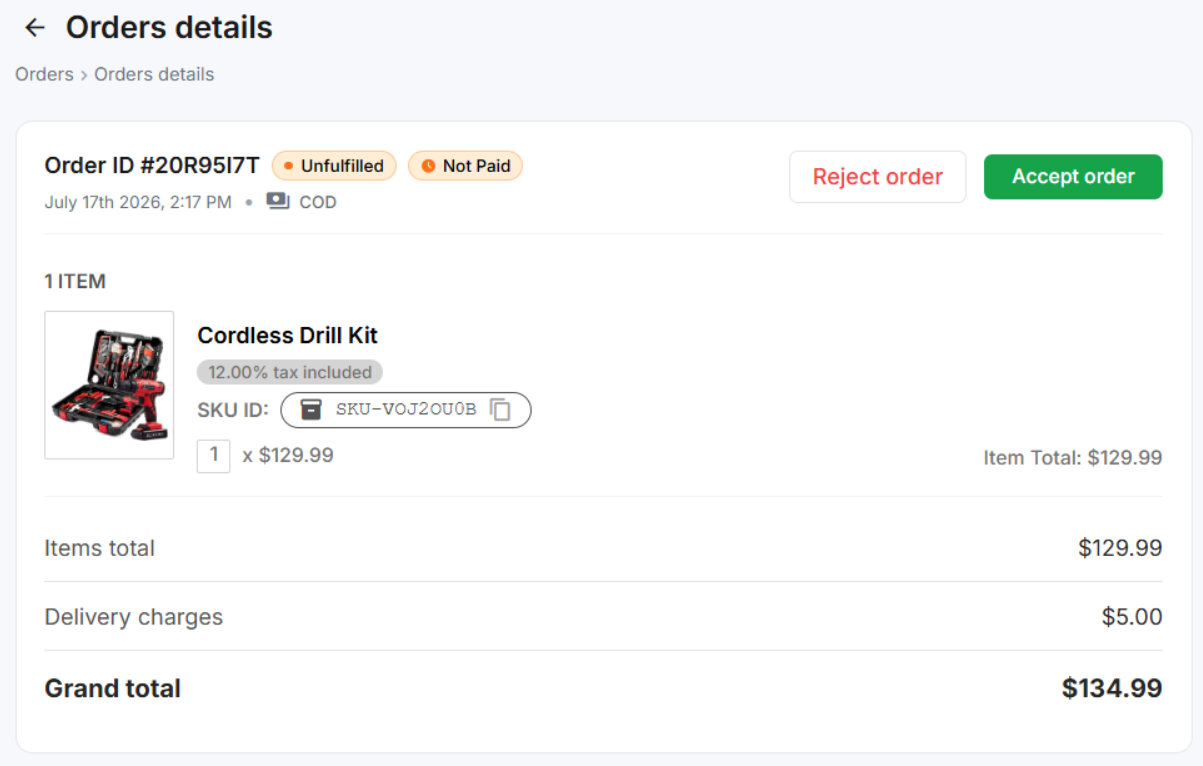
Click an Order ID to open the Orders details page, where you can see and manage everything about that order:
- Order summary, status (Unfulfilled / Not Paid), date, and payment type, with Accept order / Reject order buttons.
- Items, each product with its image, tax, SKU ID, quantity, and price.
- Totals, Items total, Delivery charges, and Grand total.
- Customer details, name, email, address, customer type, zip code, phone, city, and country.
- Order notes from customer, any notes the customer left.
- Activity, a timeline of the order (for example Order Received via online store).
- Tags, type a tag and press Enter (or click +) to add it, then click Save.
- Download Invoice, download the order's invoice.
Fulfilling an order (from new to delivered)
When a new order comes in, you take it from Unfulfilled all the way to Delivered in a few simple steps. Open the order's details page and follow along.
Accept the order
A new order shows as Unfulfilled and Not Paid. Review the items and customer details, then click Accept order (or Reject order if you can't fulfil it).
Choose a warehouse and fill stock
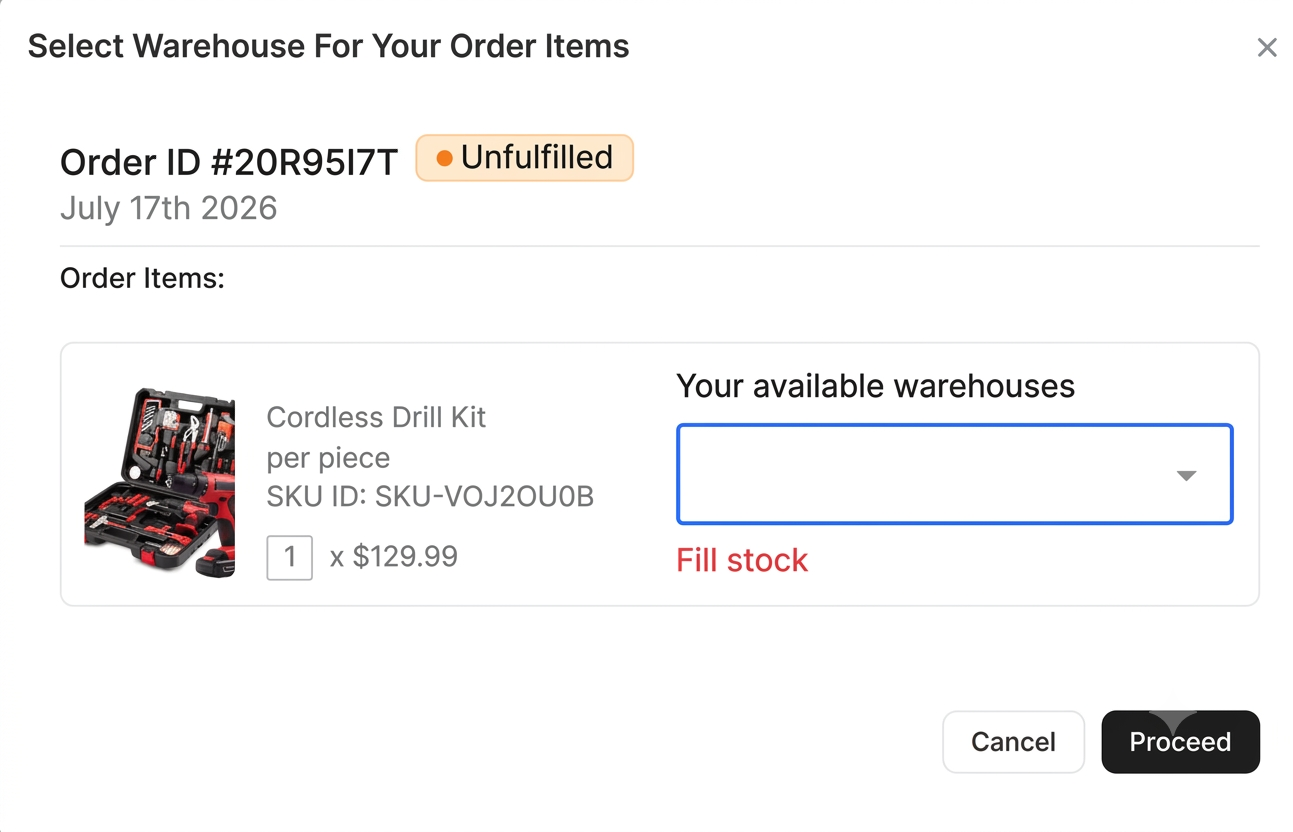
A Select Warehouse For Your Order Items window opens. Each item shows a Fill stock note, pick the warehouse to fulfil it from using the Your available warehouses dropdown.
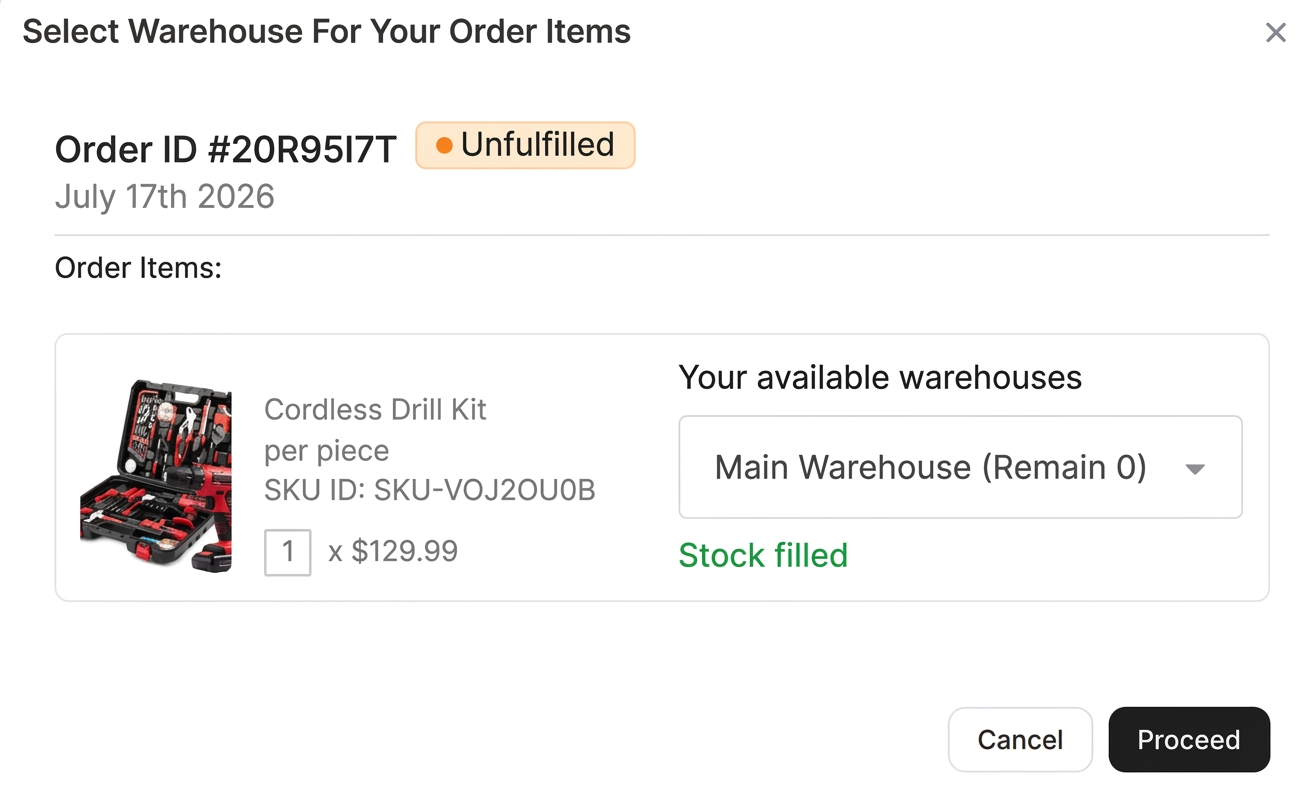
Once you select a warehouse, the note changes to Stock filled. Click Proceed to continue (or Cancel to go back).
Mark the order as shipped
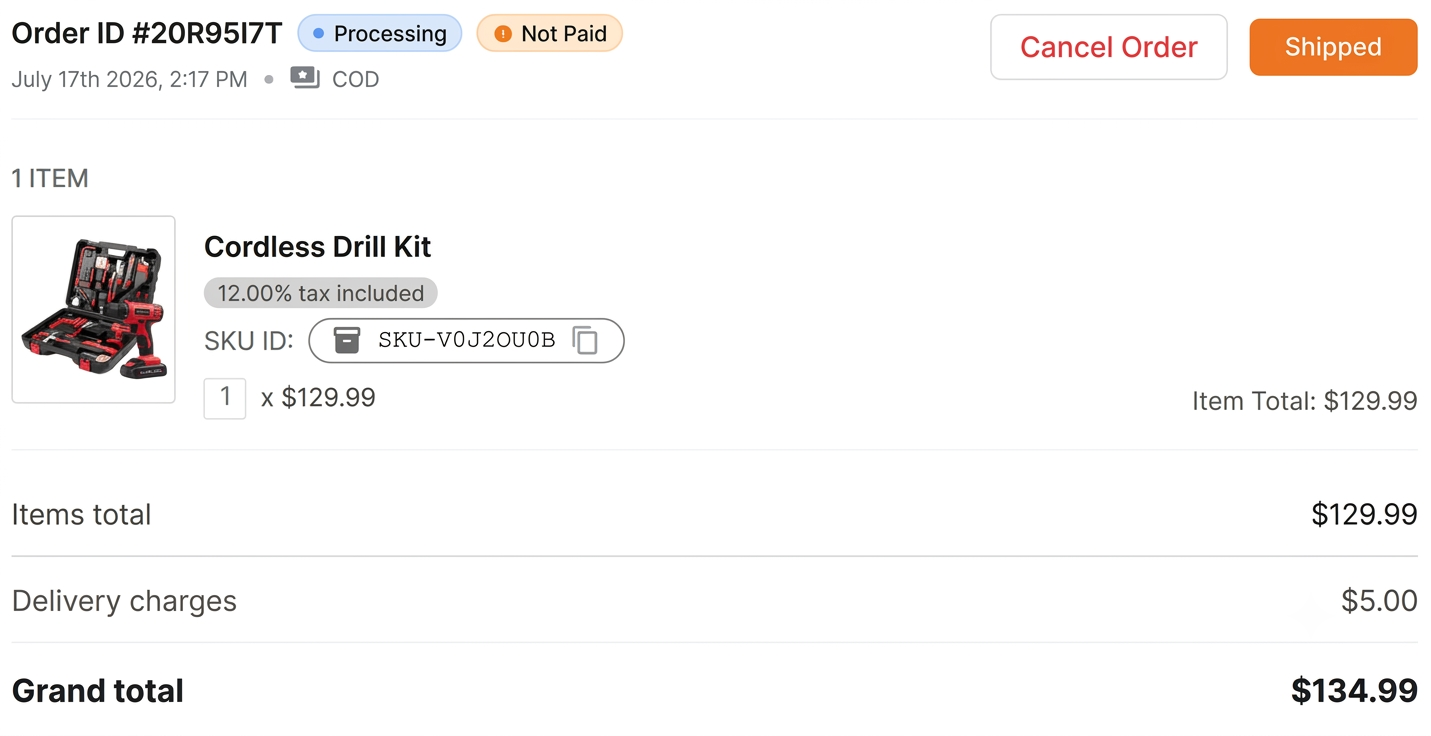
The order is now Processing. When you send it out, click Shipped.
Add the shipping details
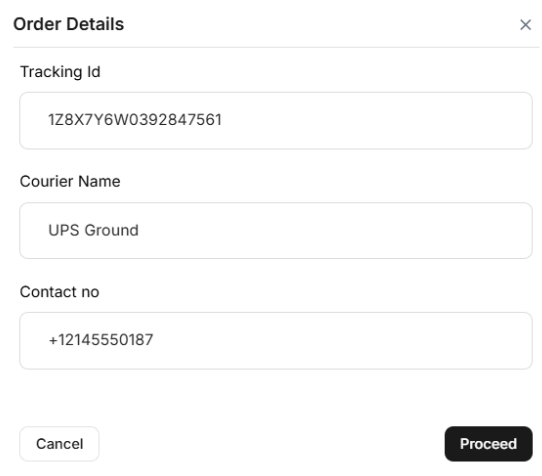
An Order Details window opens. Enter the Tracking Id, Courier Name, and Contact no, then click Proceed.
Confirm the delivery
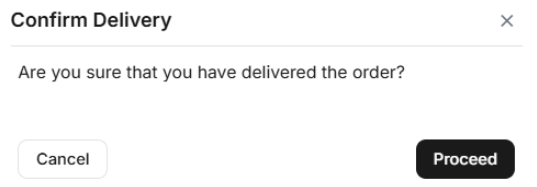
When the customer receives the order, a Confirm Delivery window asks "Are you sure that you have delivered the order?" Click Proceed to confirm.
Done, order delivered
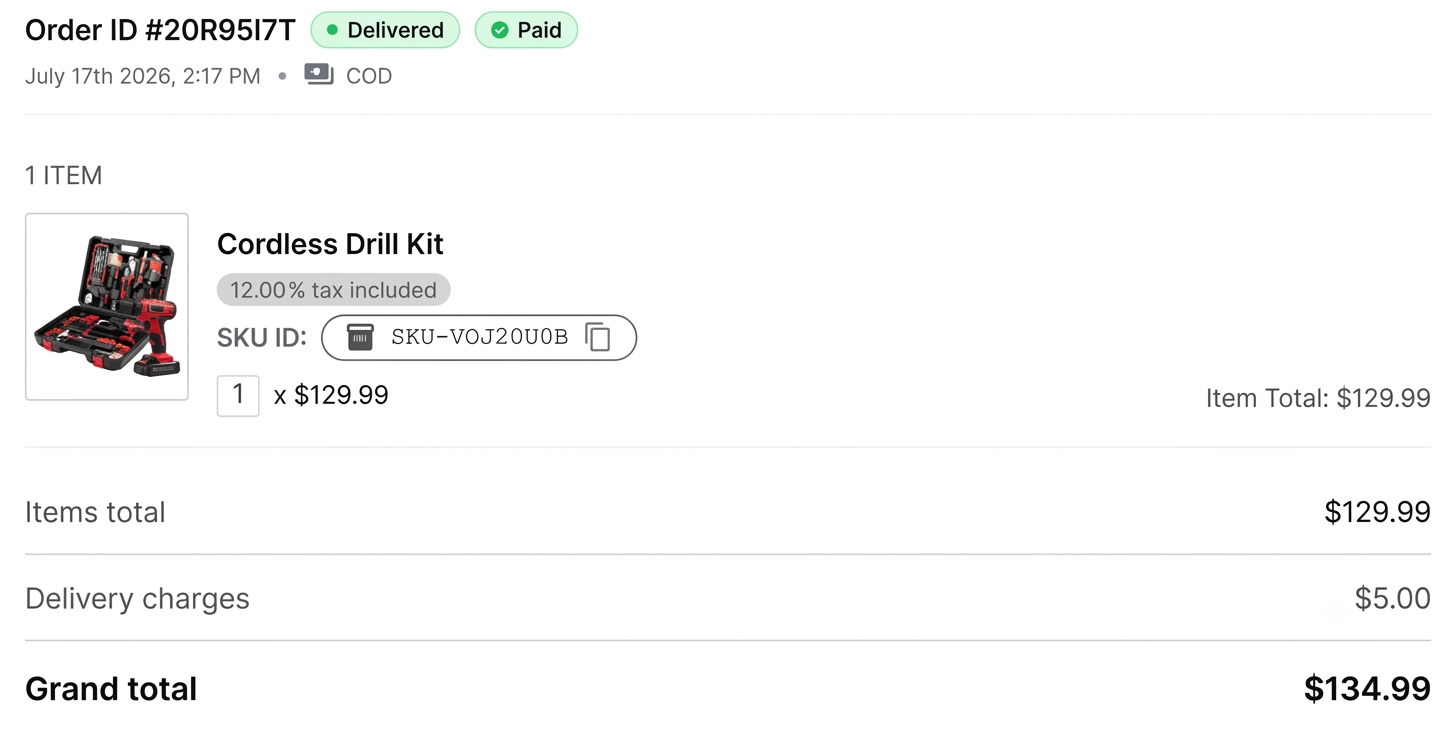
The order is now marked Delivered and Paid. The full fulfillment cycle is complete.
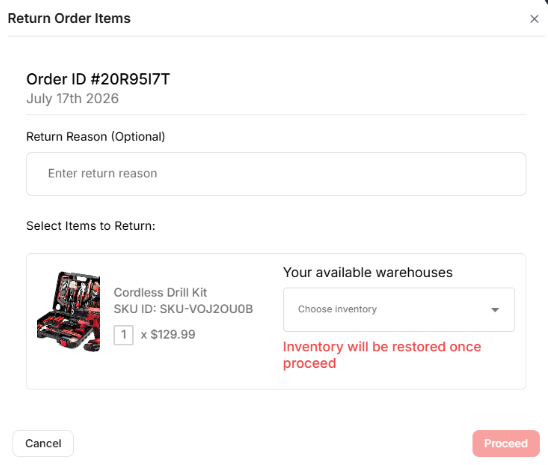
Returning an order
If a customer sends an order back, open it and start a return. In the Return Order Items window:
- Add an optional Return Reason.
- Choose which items to return and pick the warehouse under Choose inventory.
- Click Proceed, the item's stock is restored to inventory once you confirm.